| Step 1 - Setting up application defaults | |
| Once Ccdtovcd is open, select menu option "View->Application Defaults" and make sure the Temp files location is appropriate for receiving a large number of thumbnails. Its scope is for the application, i.e. it is the same for all projects. |  |
| Step 2 - Setting up application defaults - continued | |
| At least one MPEG movie must be present in the VCD/SVCD for VCDImager to work properly. Two elements must be present: a sequence item and a movie (not just a still MPEG stream). Set here its location here. I use a 6 Mpegs dummy video. |  |
| Step 3 - Creating a project | |
| Select menu option File->New to create a project. The temporary file location only applies to files created for this project. |  |
| Step 4 - Changing a project settings | |
| Select menu option Project->Settings to change the project defaults. It is important to get them right as they be will be used as defaults each time a image is imported into the tree. | 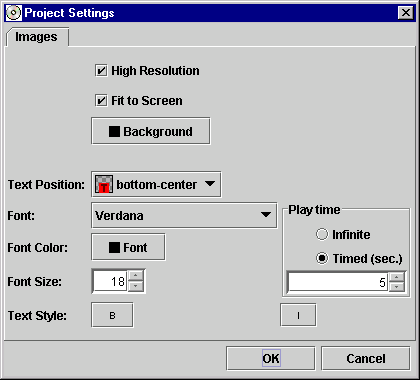 |
| Step 5 - Building a photo album tree | |
| Start by collecting images by opening a directory in the left pane. Images supported by Java (currently jpg,gif,png) will show up in the middle pane. You can now drag and drop them in the right pane. A folder is a menu. A leaf is an image. Menus can receive images too (background menu images in this case). Build your tree until you have all the images needed for your photo album. | 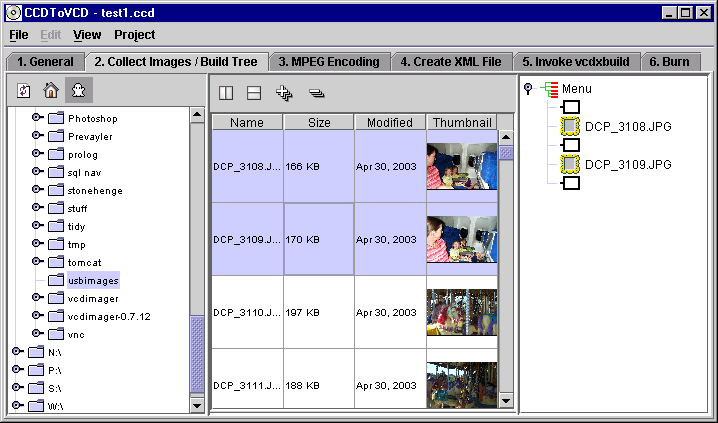 |
| Step 6 - Building a photo album tree | |
| You manipulate the tree with right clicks on its elements. A colored frame is simply a frame that you can write into. By default, the photo album will be read starting the root folder. Elements are then read in a descending fashion within that folder. If another folder is encountered then the sequence jumps to that particular folder. | 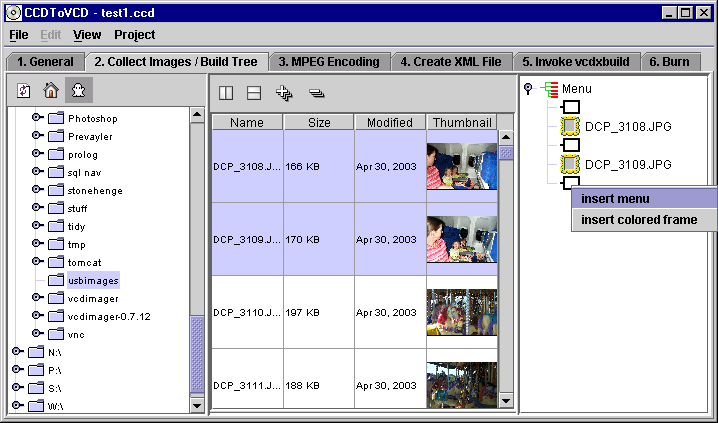 |
| Step 7 - Building a photo album tree - continued | |
|
Double click (or right click then select properties) any element in the tree in order to edit its properties.
Note that the resolution displayed is the one before scaling down the image due to image scaling issues on a TV, see http://www.vcdimager.org/guides/mpeg_still_images.html. | 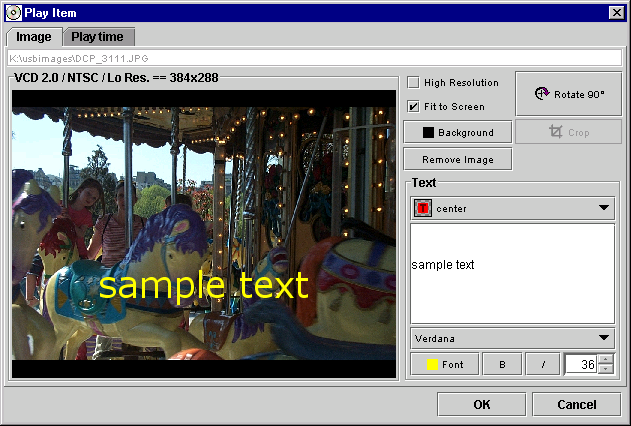 |
| Step 8 - Building a photo album tree - continued | |
| For menus, use menu style "Do nothing" and the menu will be skipped, as though it did not exit, i.e. the photo sequence will jump from the previous image to the next available element in the tree sequence. Select "Stepping stone" and the image in the menu will be handled like in other image. Select "Manual Selection Menu" and each selected element on the right hand side will map to an menu entry on your DVD remote (i.e. press '1' on your remote and it will jump to the first highlighted element, press '2'...). Select "Automatic" and Ccdtovcd will create an entry for each sub-folder (i.e. press '1' on your remote and it will jump to the first sub-folder ...). You would normally use folders as jump points from a menu (not like this example) so that the sequence goes back to the calling menu when a called menu is completed. | 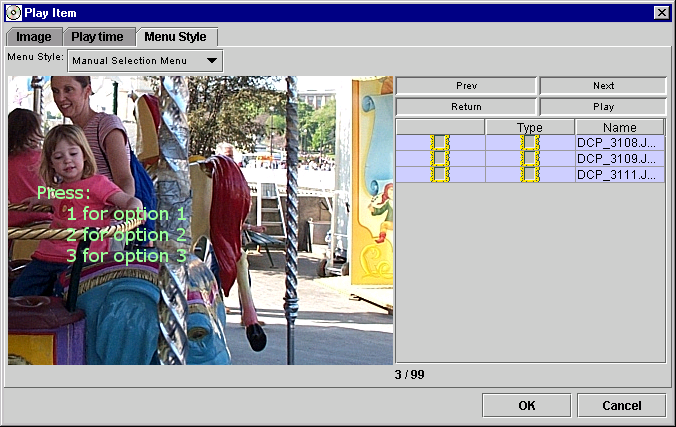 |
| Step 9 - Encoding an image to MPEG1/2 | |
| MPEG still system streams (*.m1p for VCD2.0 and *.m2p for SVCD1.0) will be placed in the project temp location. | 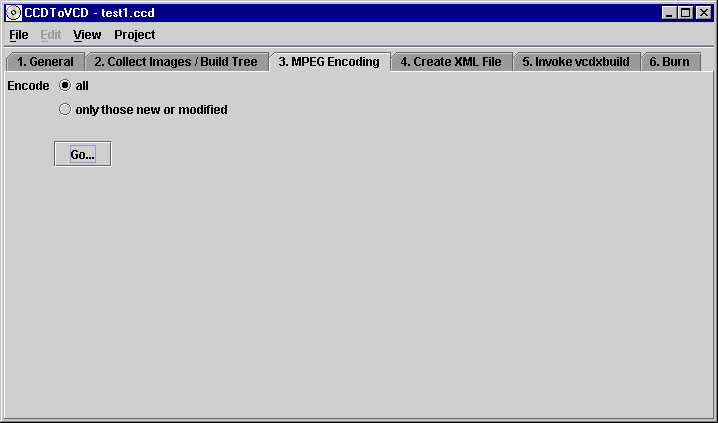 |
| Step 10 - Producing an XML file that can be used by VCDImager to create a burnable file | |
| Click on the "Refresh XML" button in order to generate a VCDImager XML file. Edit it manually if you want to. You must then click on "Saves Changes" even though you did not change anything (to be fixed!!!). | 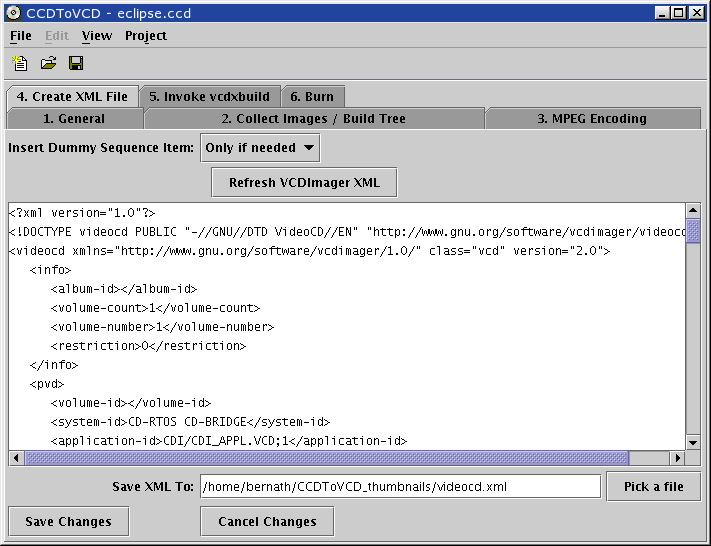 |
| Step 11 - Invoke VCDImager (VCDXBuild) | |
| You are now able to invoke VCDXBuild (a VCDImager program) that will convert the XML file to a burnable file (I know, I know, so many steps...). But first, tell Ccdtovcd where the vcdxbuild executable is located). | 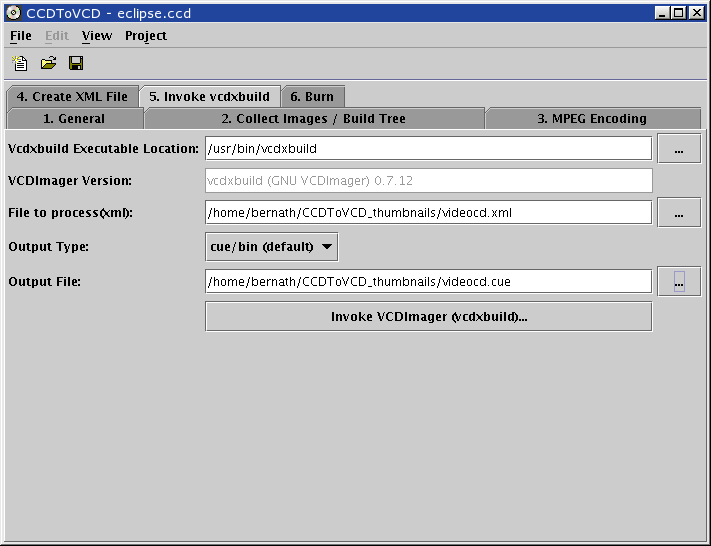 |
| Step 12 - Invoke CDRDAO | |
| This step is optional if you decide to use a product other than CDRDAO (Nero for example). As with VCDImager, tell Ccdtovcd where the CDRDAO executable is located. | 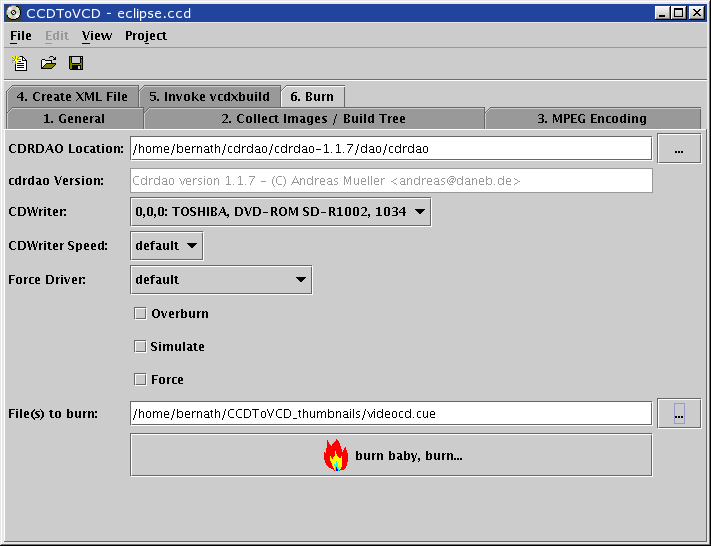 |
Basic Features
Support Matrix
Complete Features
Example
How To Install
Download
Forums
Sourceforge Project Homepage
Changelog
Donations
License
Thanks
About the Author